Hey everyone! Alex from RenderLion is here to walk you through creating dynamic text-based videos in minutes. This step-by-step post guide is for digital marketers, social media managers, event organizers, content creators, business owners, educators, and online community managers.
In the post below, I'll show you how to convert simple text into captivating animated videos using the RenderLion Text-to-Video Generator. I'll cover everything from setting up your profile to rendering and downloading your final video.
In this how-to post, You'll learn the steps to generate stunning videos from simple text inputs. So, let's get started!
Opening & Setting up the Text-to-Video Generator
Once you've logged into your RenderLion account or registered, click the "Generate" button and select the "Text to Video" option to start.
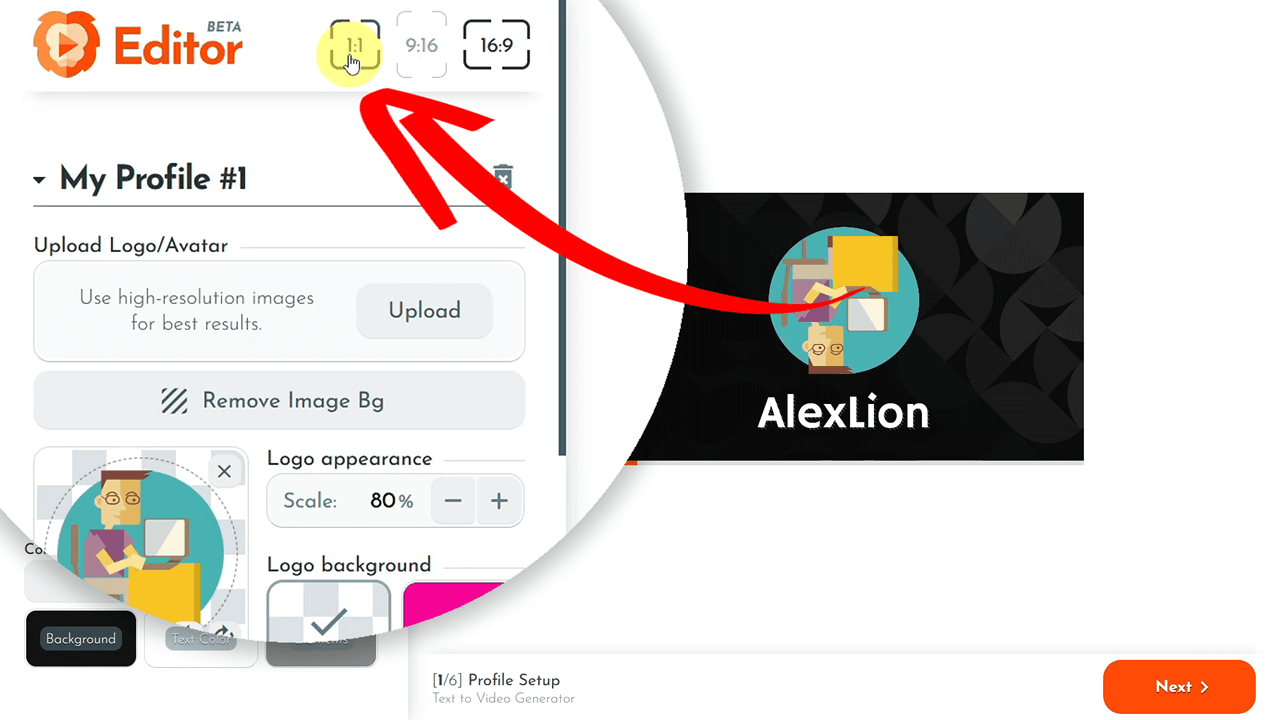
RenderLion simultaneously creates your videos in three sizes: square, portrait, and landscape. You can switch preview options by clicking the format buttons at the top. I'll use the square format for this tutorial.
Setting Up Your Text-to-Video Profile
One of the essential initial steps is setting up your profile. Your videos will be based on this profile, and any adjustments will be carried over to all future videos.
Uploading Your Logo/Avatar
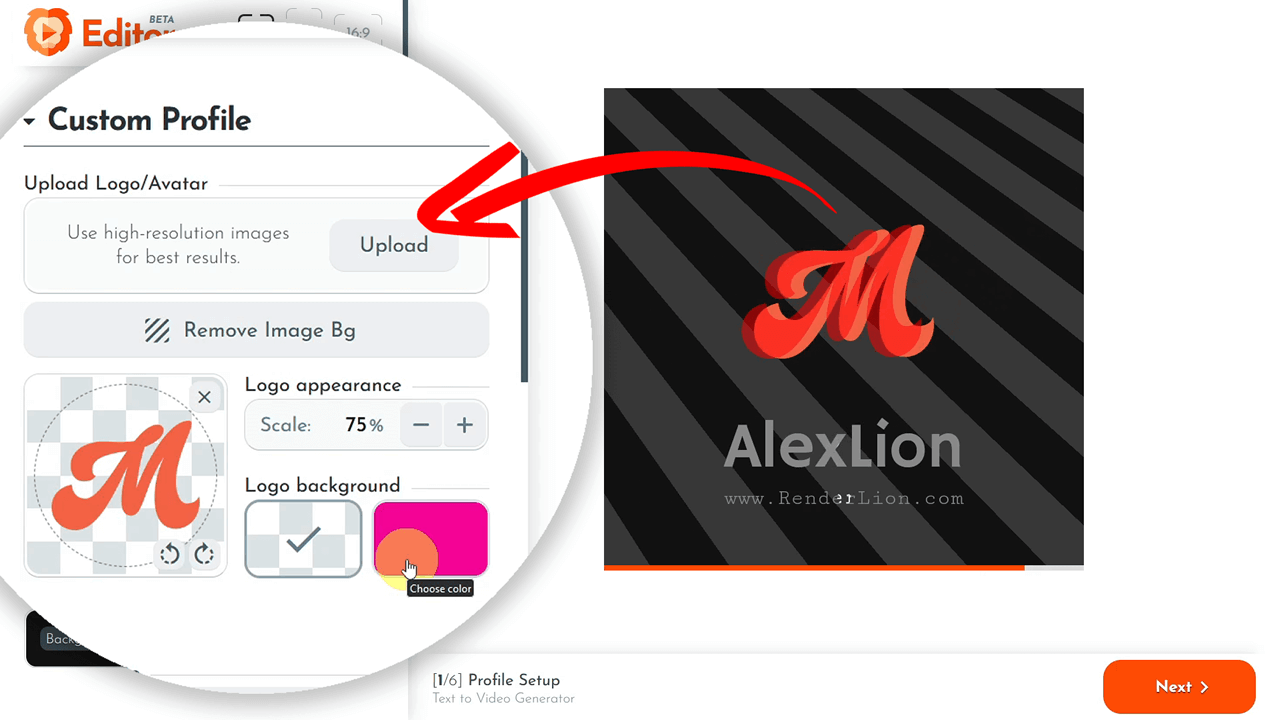
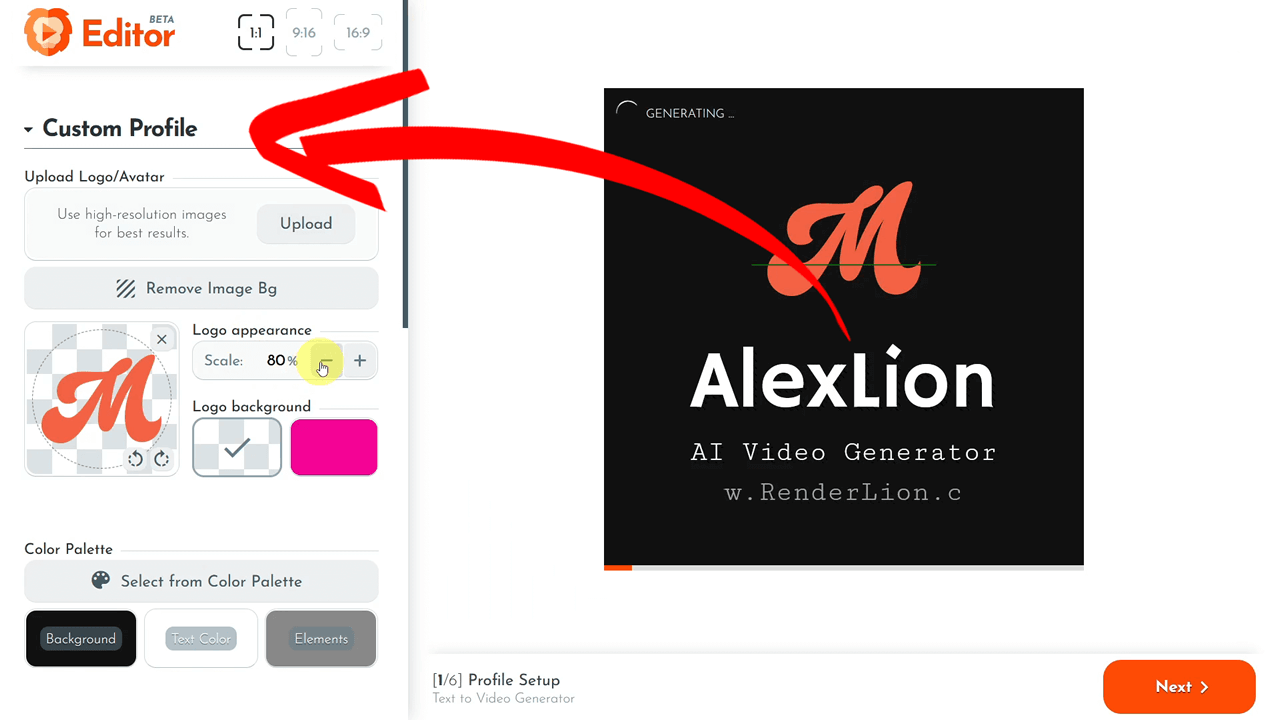
If you didn't set up a RenderLion profile, you must upload your logo, avatar, or any image representing your brand. For example, I'll upload my logo and adjust its scale to 75%.
You can select your colors and fonts once your logo is adjusted and uploaded.
Selecting Colors for the Text-Based Video
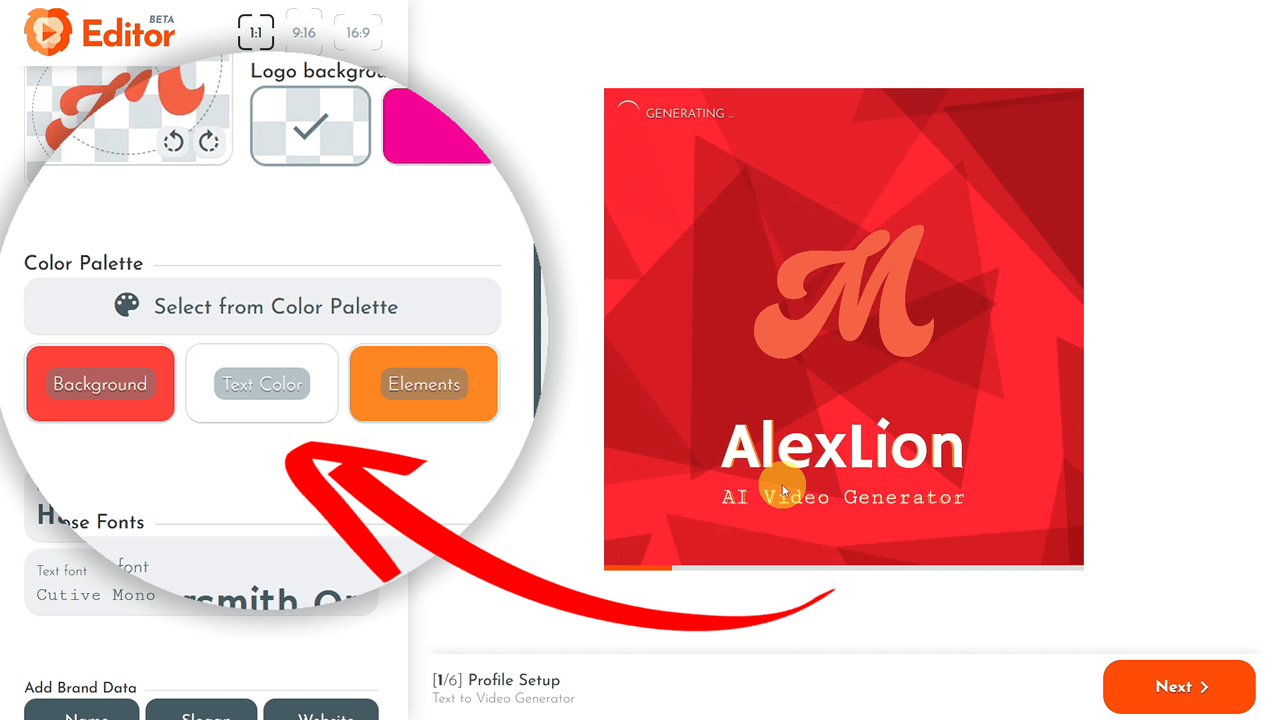
You can customize your video colors, including background, text, and elements, or select from a predefined RenderLion palette. I chose a palette with a red background, white text, and orange elements. Your choices will update in real-time on the video preview screen on the right.
Choosing Fonts for the Text-Based Video
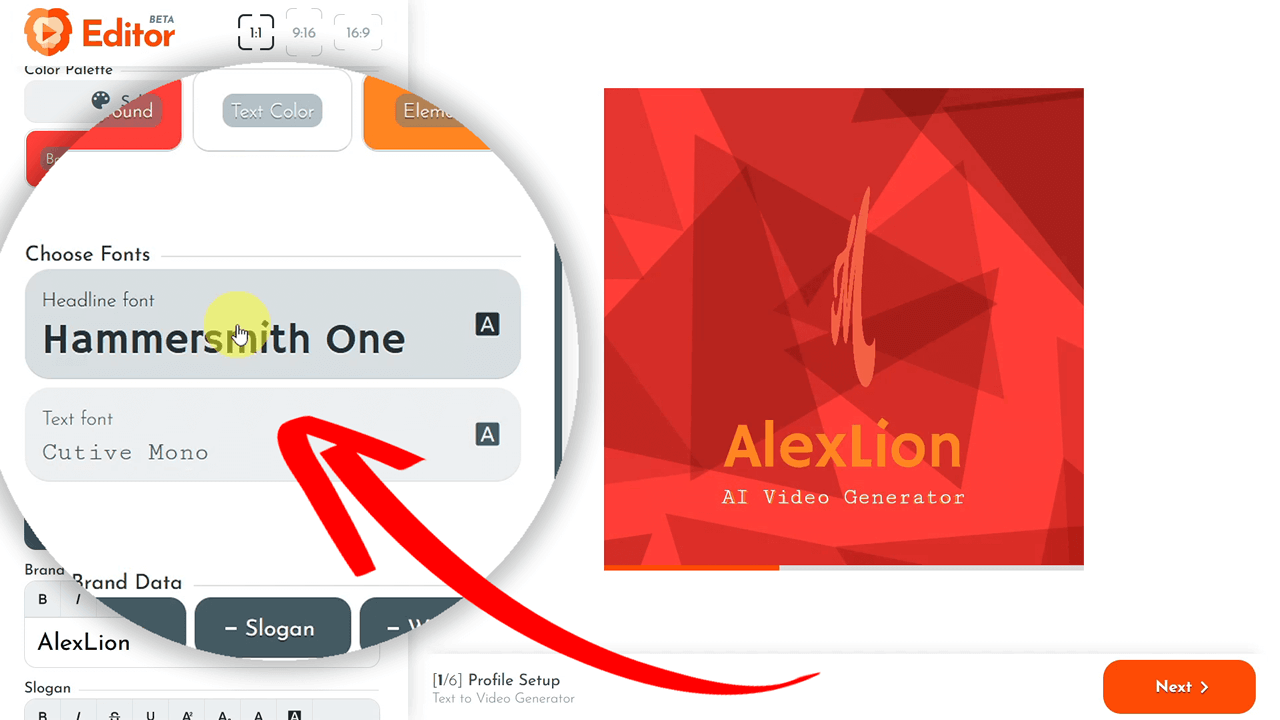
Next, pick your fonts for the headline and regular text. I opted for the "Anton" font family for the headlines and "Cutive Mono" for the regular text. All your changes will be reflected immediately in the preview animation.
Adding Brand Information
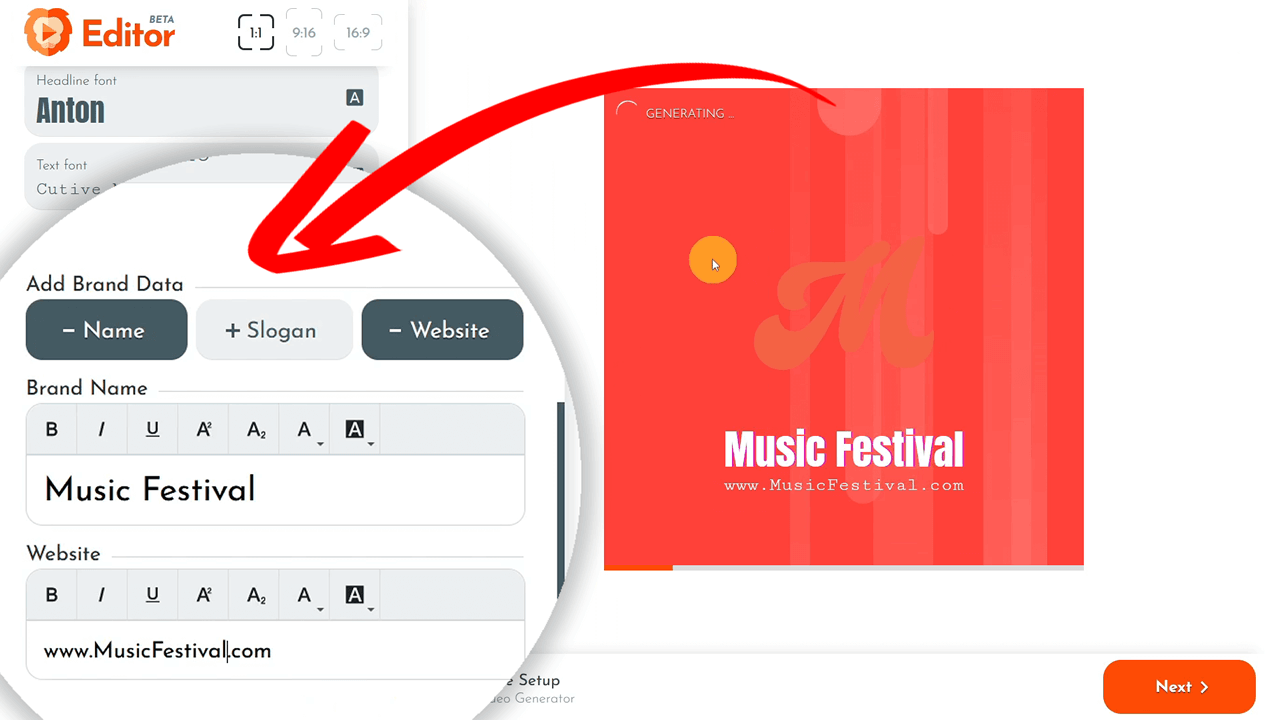
You can add or skip brand details like your name, slogan, and website. I updated my brand name to "Music Festival" for this example and used a default website.
Setting the Video Background
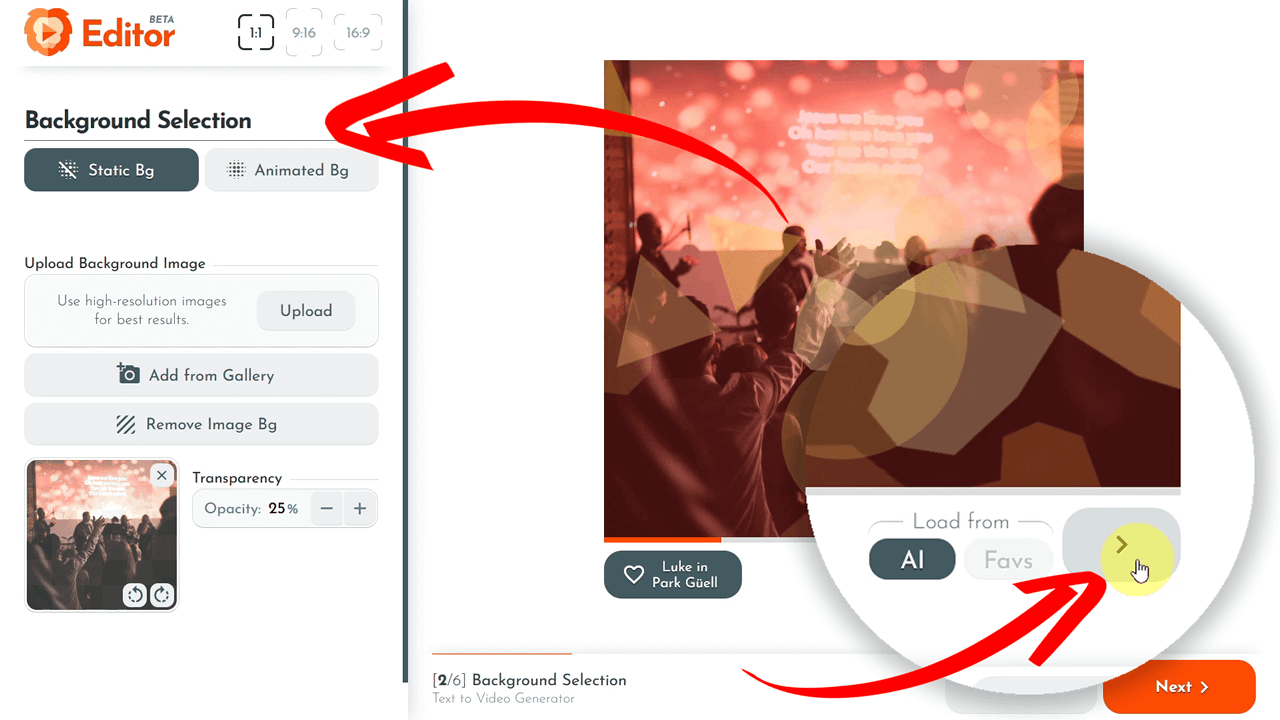
Moving on to the background, you can choose a static or animated one. I opted for a static background and selected an image from the RenderLion gallery. Adjusting transparency settings can fine-tune your video's look.
RenderLion offers an extensive selection of backgrounds. Click the "Right arrow" to generate different options until you find one that suits your video.
Adding Blocks & Populate the Text Inputs
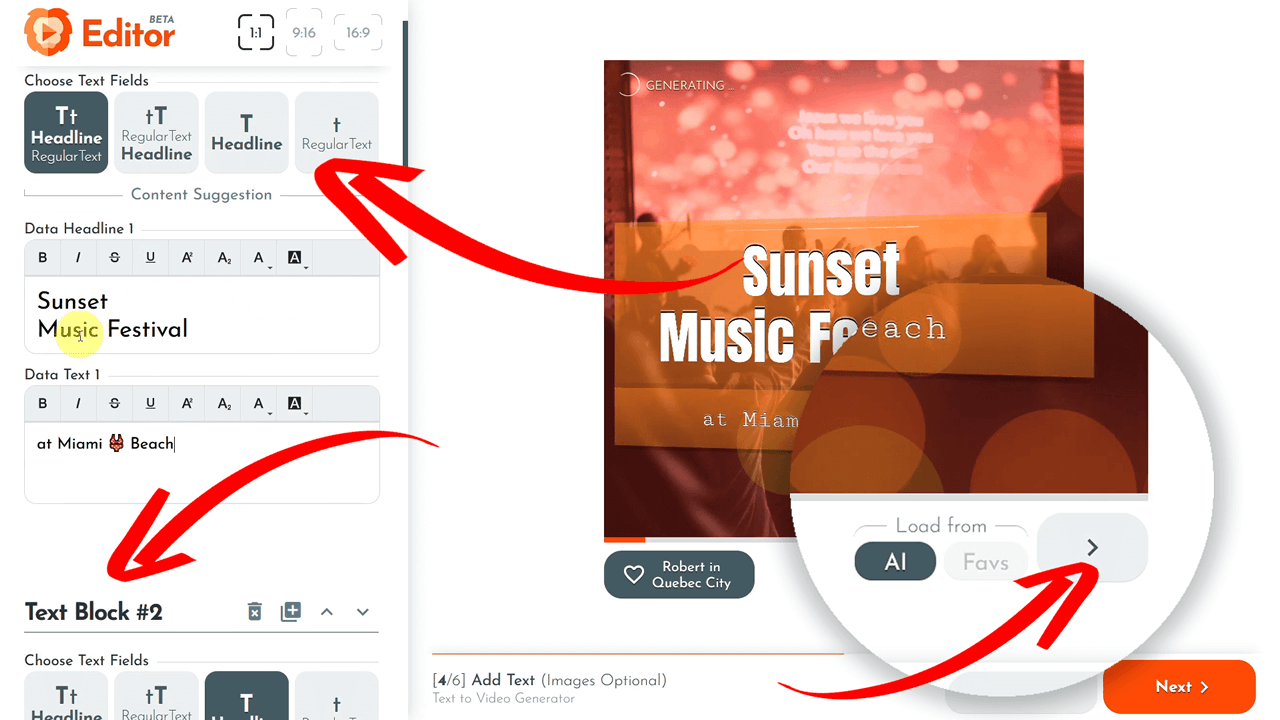
Adding text blocks is straightforward. Each block serves as a scene in your video. You can use different formats like headline and text, text and headline, headline only, or regular text only. For example, my video announcement includes six text blocks with varying content formats.
Enhancing Your Video with Photos
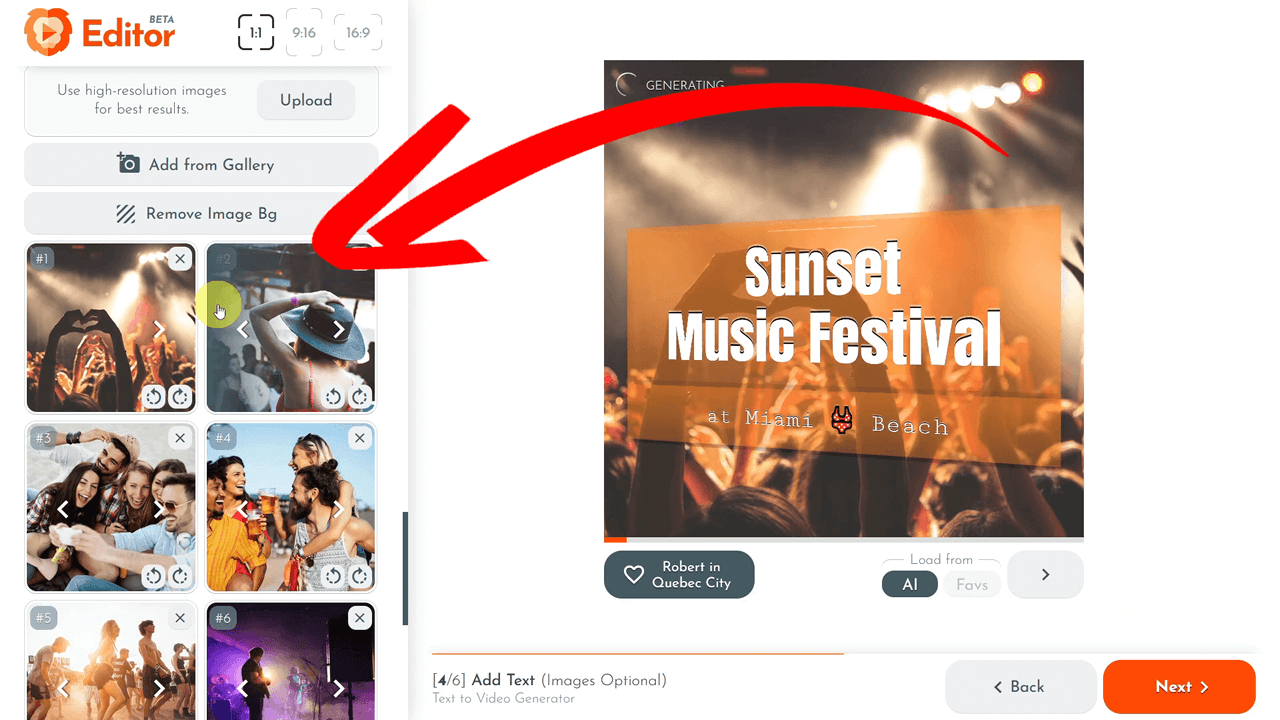
Elevate your text-based videos by adding images from RenderLion's gallery or uploading your own. Preview and adjust in real-time without worrying about design elements.
Final Settings Checks & Adding Sound
Once you've added texts and images, double-check your content through the video preview timeline. Ensure everything fits your preferences and is appropriately sequenced.
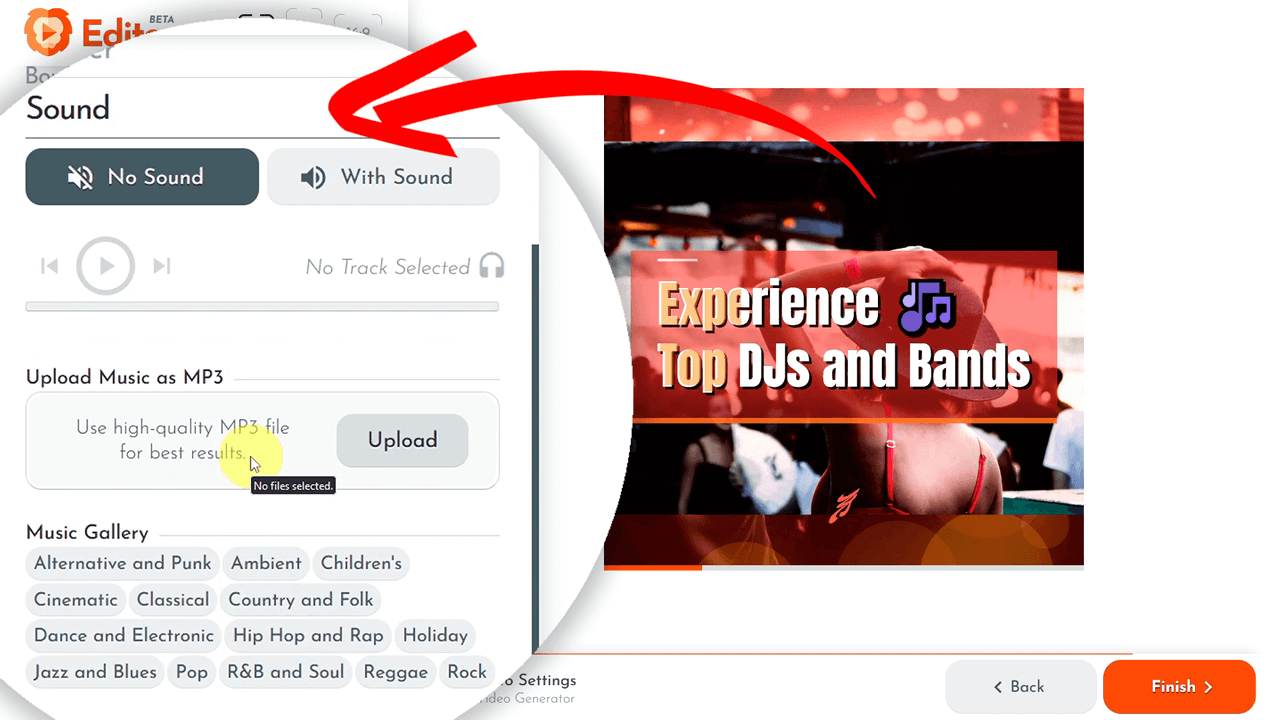
Choose a background sound from RenderLion's music gallery or upload your tunes. The selected sounds will enhance the overall appeal and create the desired mood for your video.
Save, Rendering and Downloading Your Video
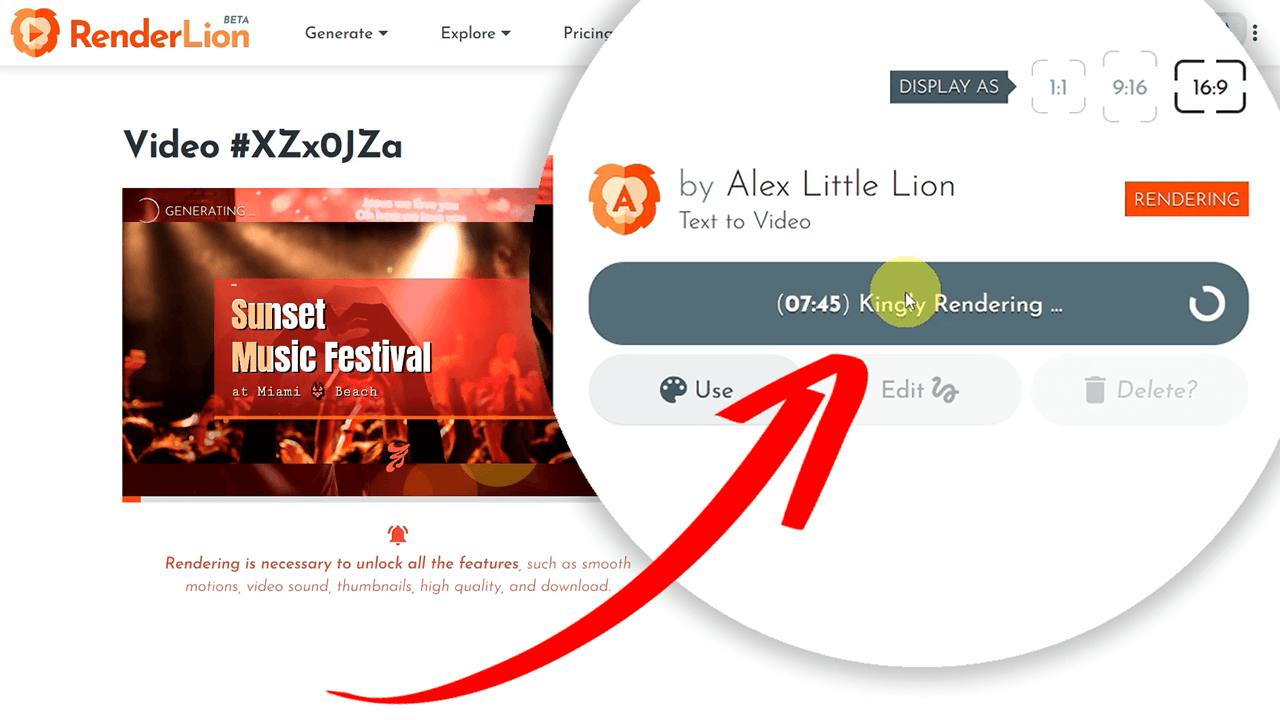
Does everything look good? Then, click the "Finish" button to save your video. You can render in three formats: square, portrait, and landscape.
The rendering might take some time, but the output will be high-resolution with an attached soundtrack, downloadable in MP4 format with thumbnail images.
Final Thoughts: Mastering the Text-to-Video Tool
And there you have it! This is your comprehensive guide to turning text into dynamic videos using RenderLion's Text-to-Video Generator. The simplicity and power of RenderLion allow your creativity to shine without the hassle of intricate video editing.
Thanks for watching this tutorial and reading the RenderLion hub post. I'm Alex, the founder of RenderLion, and I hope to see your video creations soon on our platform.