Hey, everyone!!! I'm Alex, the founder of RenderLion. In this RenderLion Hub post, I'm excited to show you how to generate an engaging intro animation using RenderLion.
Jumpstart your video projects with RenderLion by generating engaging intros that capture your brand's essence. This quick tutorial takes you through the essential features to create animated video intros that resonate, starting from your Profile and static data.
📖 What You'll Learn:
- — How to set up your RenderLion profile for animated intros;
- — Choosing the right background for your video's intro;
- — Adding and customizing text and images for your intro;
- — Choosing your animated intro style from AI-generated effects;
- — Fine-tuning video settings for a polished look and save;
- — Render and Download your intro auto-optimized for different video formats.
🙋♂️ Who This is For:
- — Content Creators
- — Digital Marketers
- — Creatives looking for easy video solutions
- — Small Business Owners
- — Social Media Managers
Before we start, please ensure you are logged in to your RenderLion account. Let's get started!
Getting Started with the Intro Generator
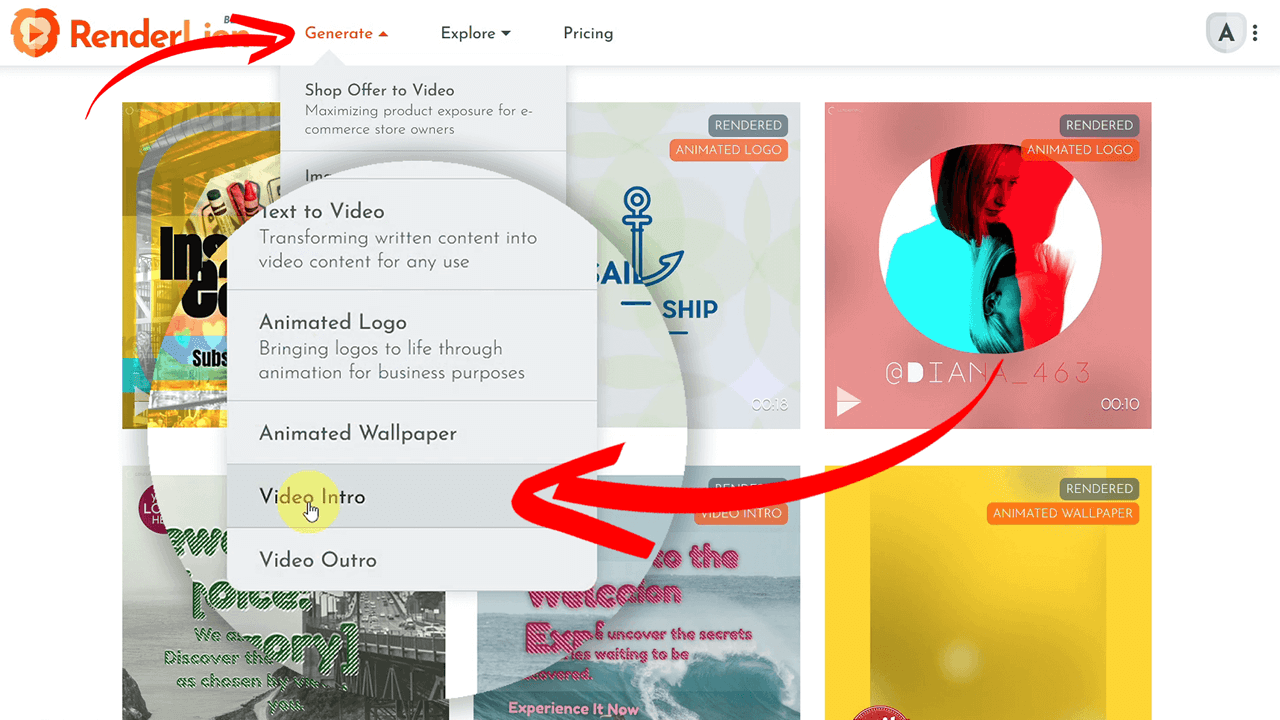
First, click the "Generate" button in the header menu and choose the "Video Intro" option. It's a straightforward way to get started with the magic! Once your Profile is loaded, we can start generating an animated intro.
Intro Preview Setup
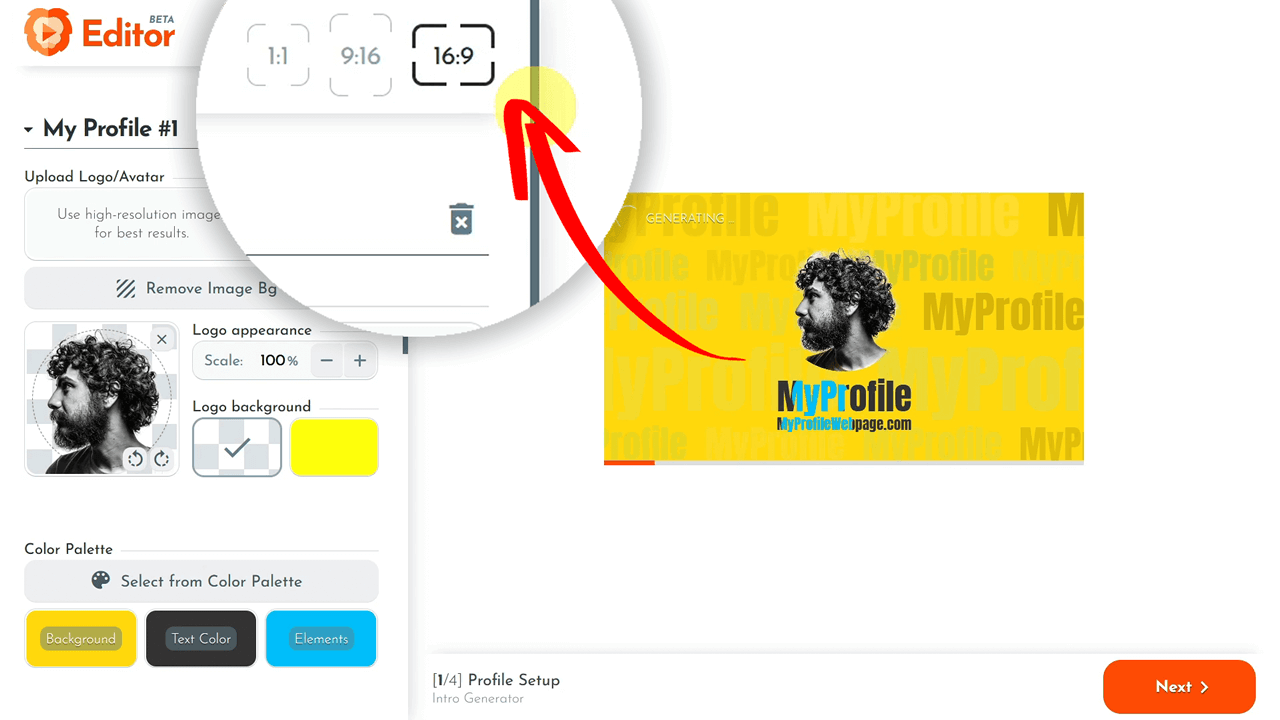
All videos generated with the RenderLion tool are created in three sizes: square, portrait, and landscape. This means no extra editing is needed! I selected the default video preview in a square format for this tutorial.
Setting Up Your Profile
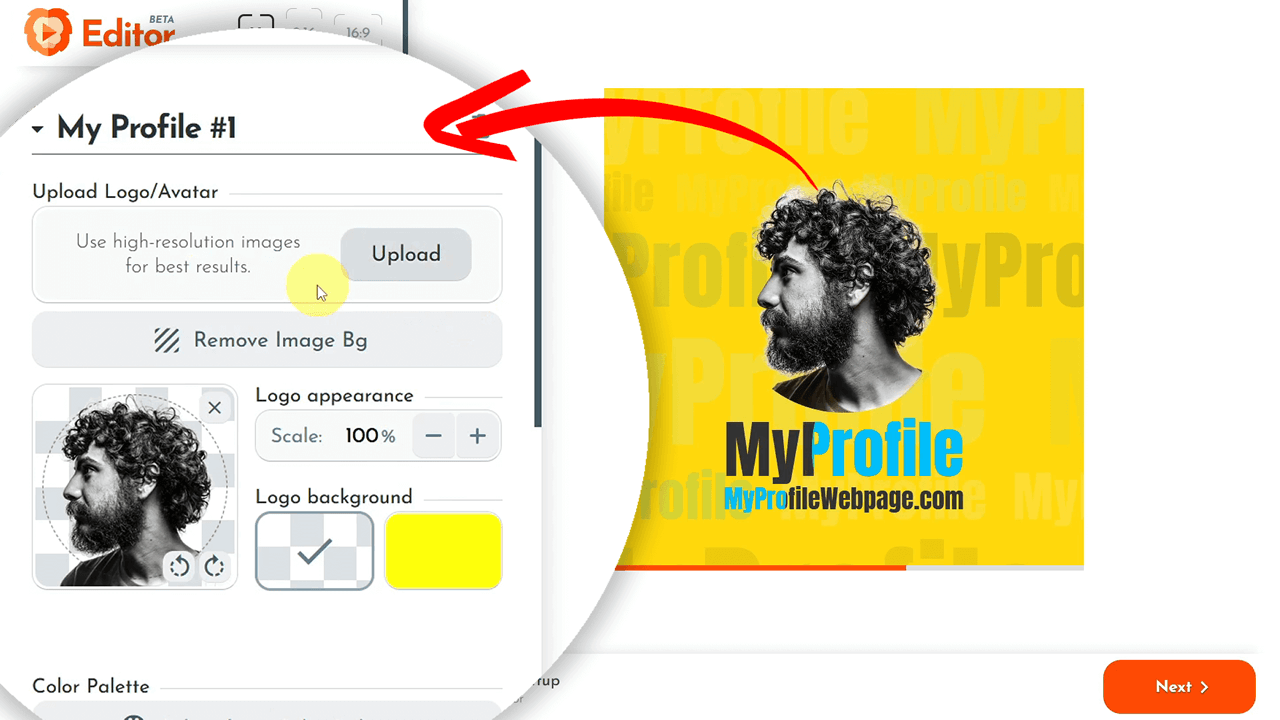
You can set up your Profile only once, and it will be used for all your future videos. Let's start by uploading your company logo, avatar, or any preferred image. In my example, I uploaded a company logo called "Lilly." After uploading, the changes will be reflected in real time in the video preview section.
Selecting Your Preferred Color Palette
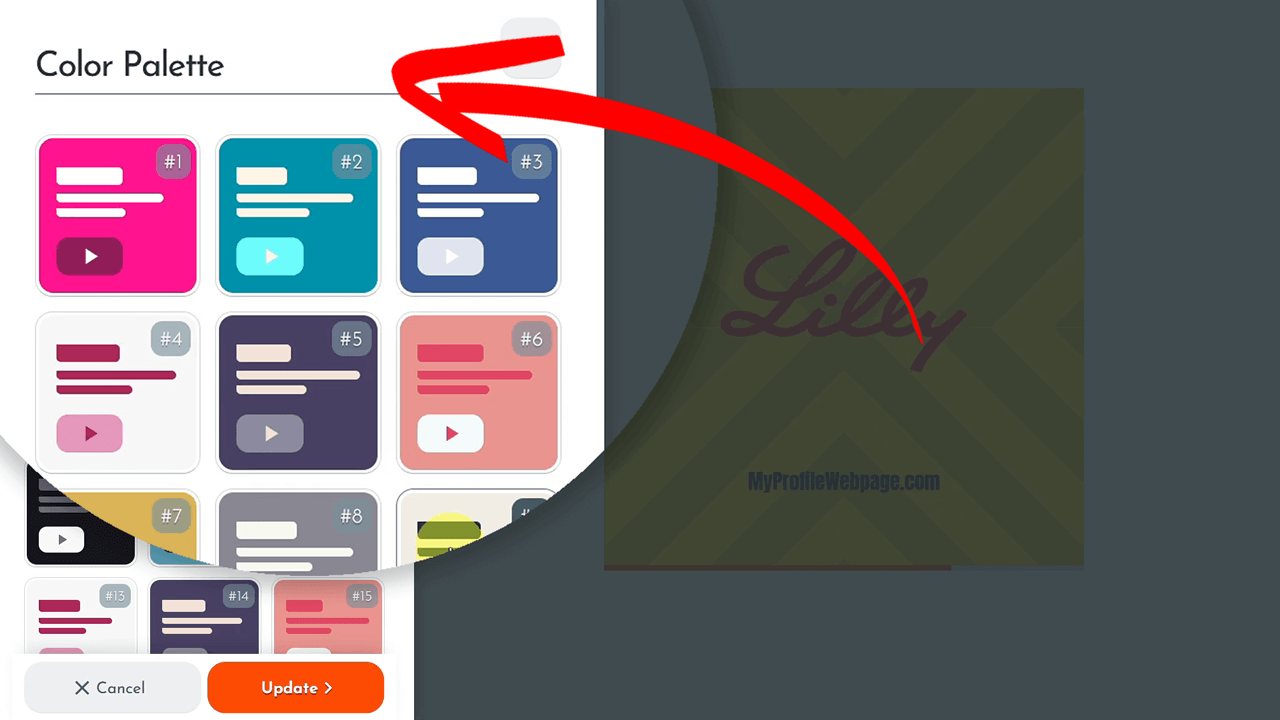
Next, we select the color palette. The colors set now will be used in all future videos generated using RenderLion. You can customize colors like the background, text, and elements.
Choosing Fonts When Setting Up Your Profile
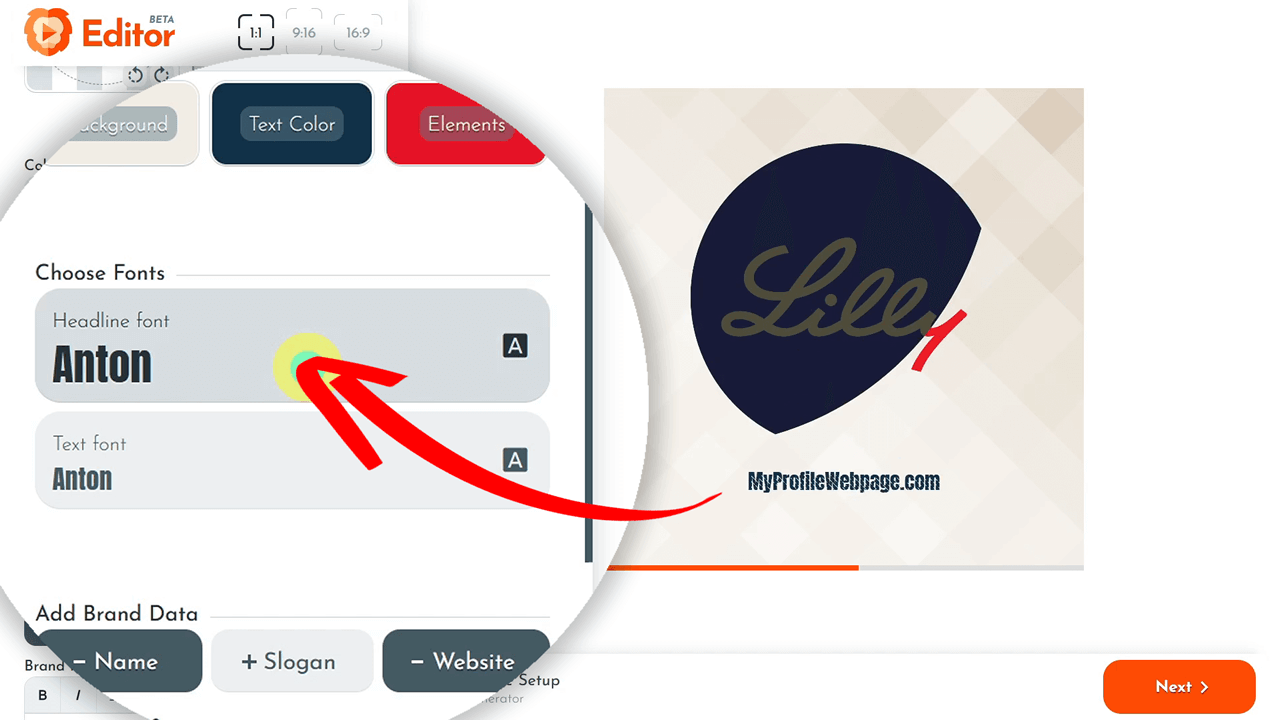
For the fonts, click on the headline font, choose the desired font, and click Update. Repeat the process for the regular text as well.
Adding Brand Info
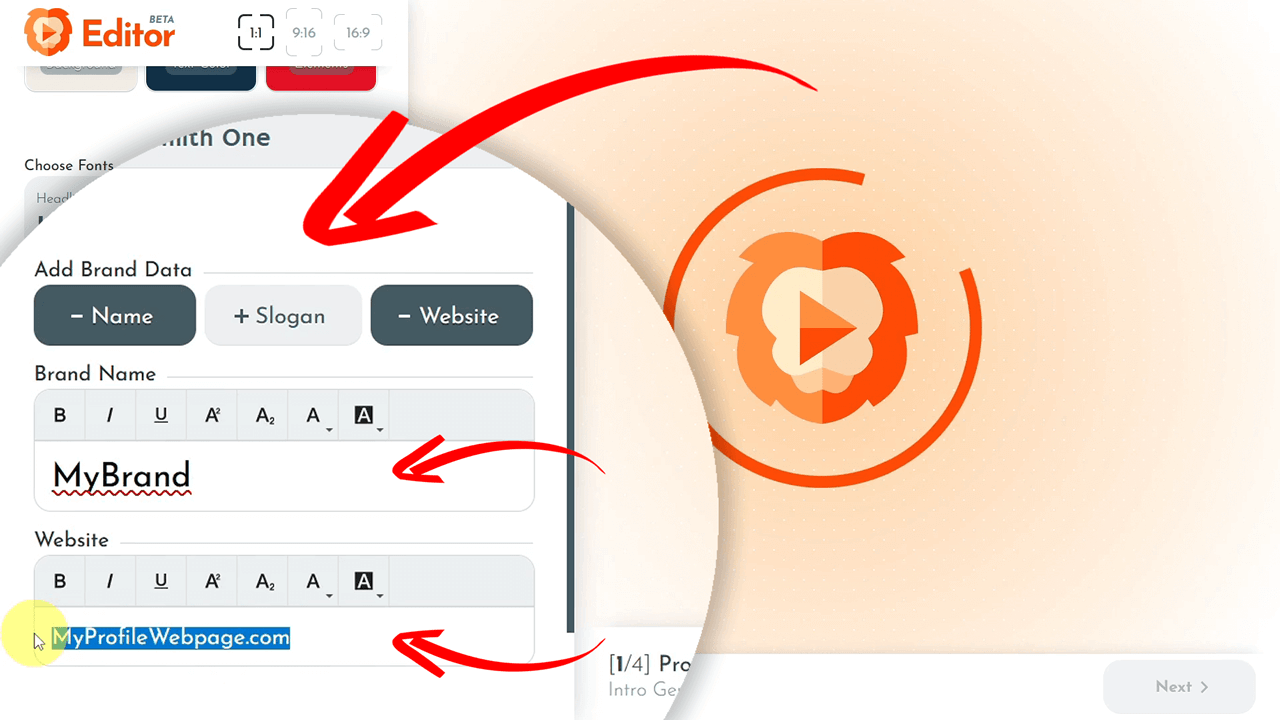
Add your brand name, slogan, and website. These are optional, so feel free to skip them.
Setting & Generating the Intro Background
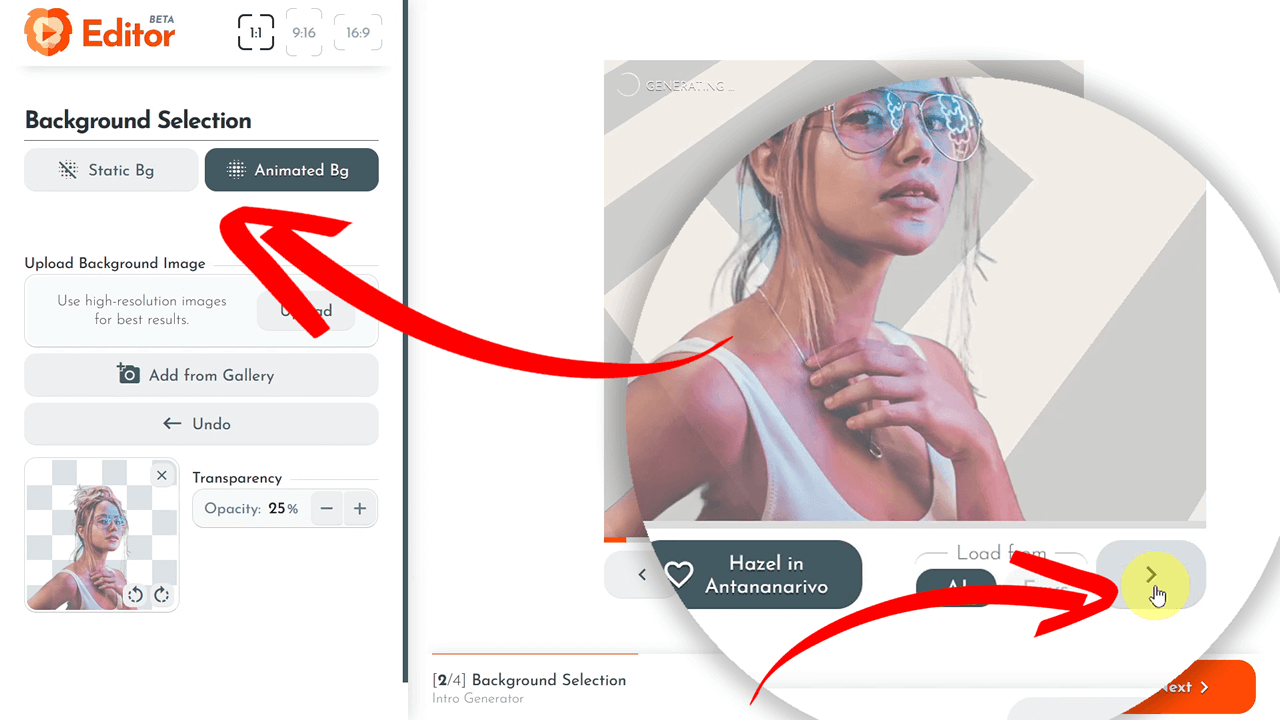
Now, let's choose a background for the intro animation. You can select a static or animated background. For this example, I picked an image from the RenderLion gallery and adjusted the opacity. Additionally, you can remove the image background if you prefer.
Adding Engaging Text for the Video Intro
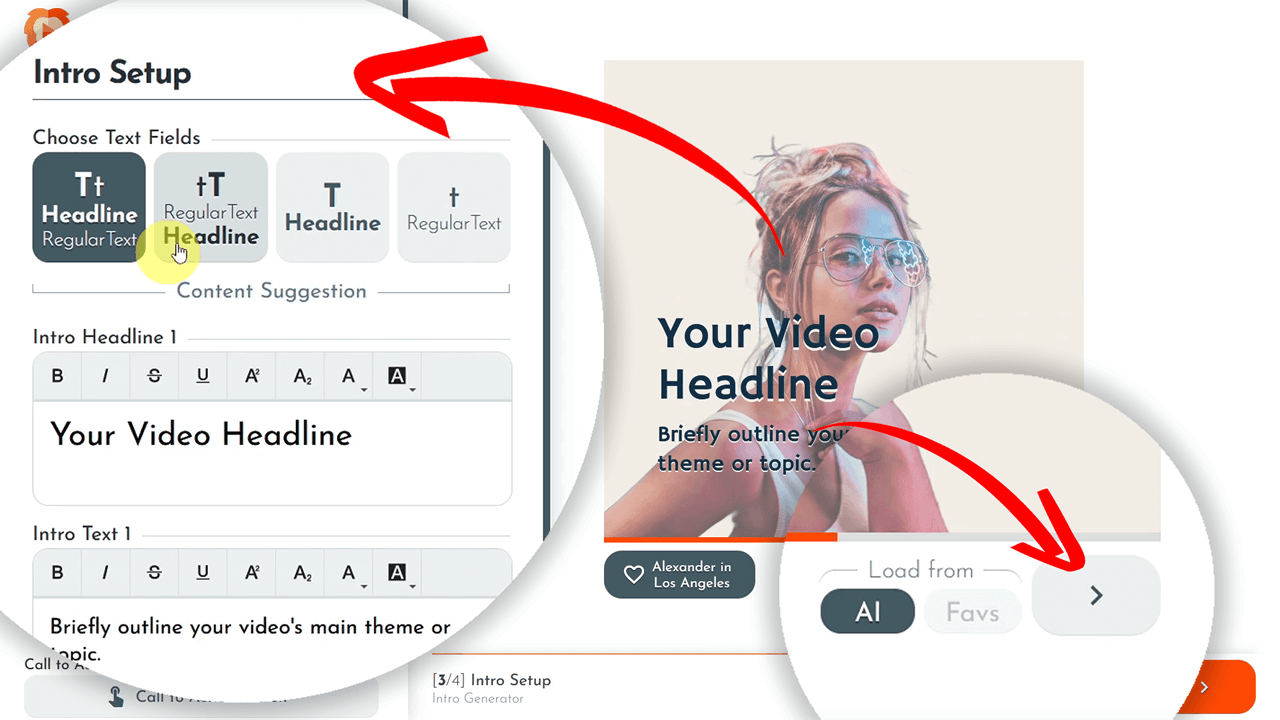
You can mix text in various combinations - Headline plus Text, Text and Headline, and more. I chose a two-row headline: "Shop More, Save More," and added an engaging regular text message: "Up to 50% off now!"
Final Video Settings
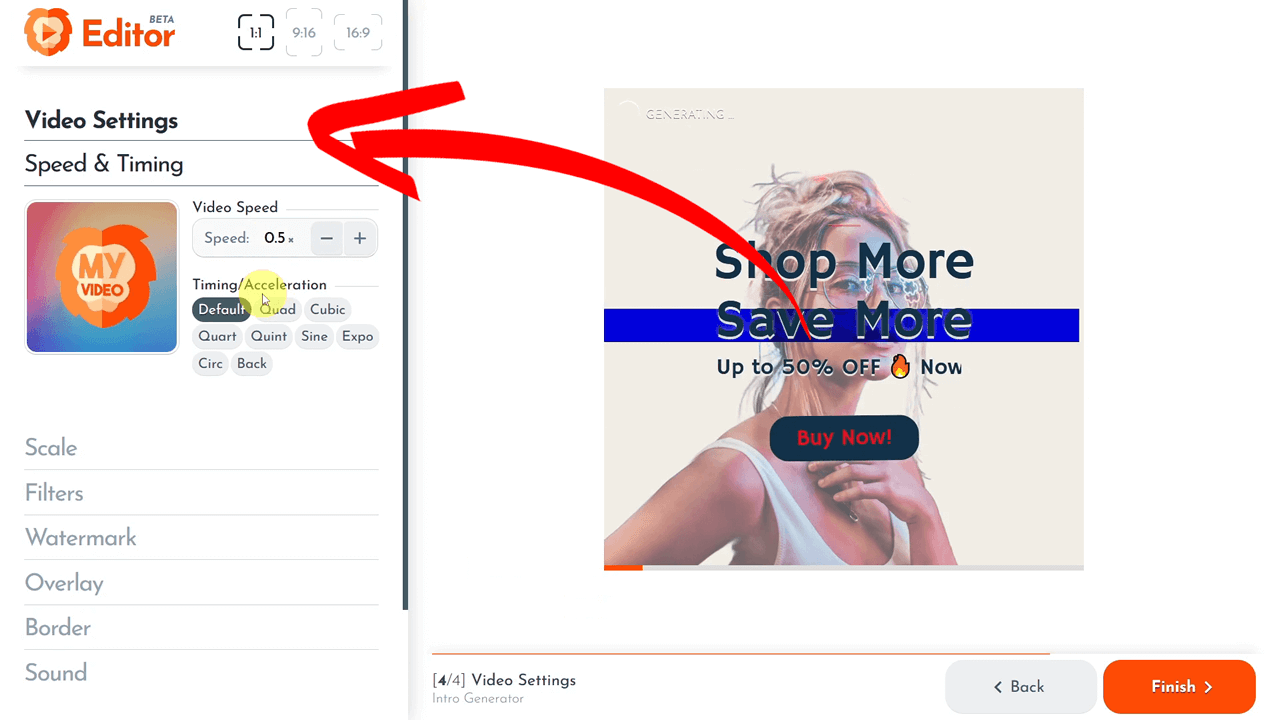
You can adjust the video intro speed and animation timings in the final settings and even apply filters. I prefer the default values in my example, but feel free to customize them to fit your requirements.
Adding and Animating Watermark
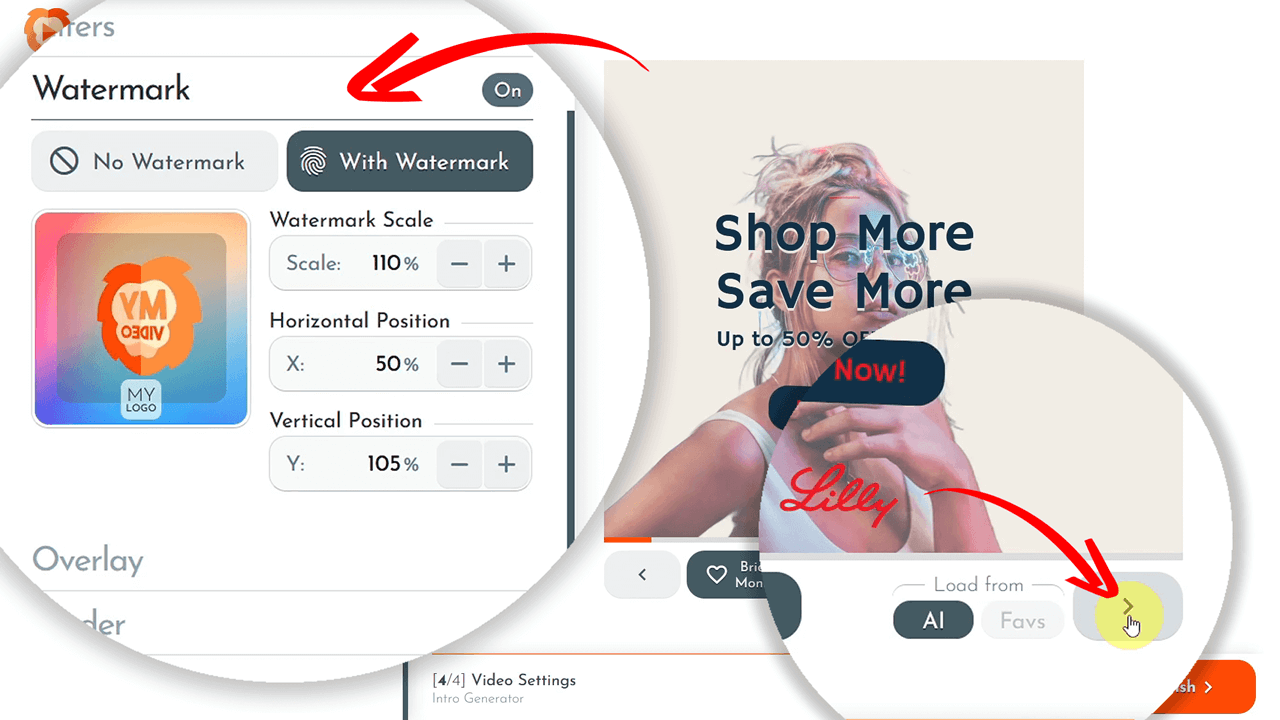
You can set up an animated watermark for your video intro by positioning and scaling it as needed. Each click under the video preview generates a new animated effect for your watermark.
Adding an Animated Border
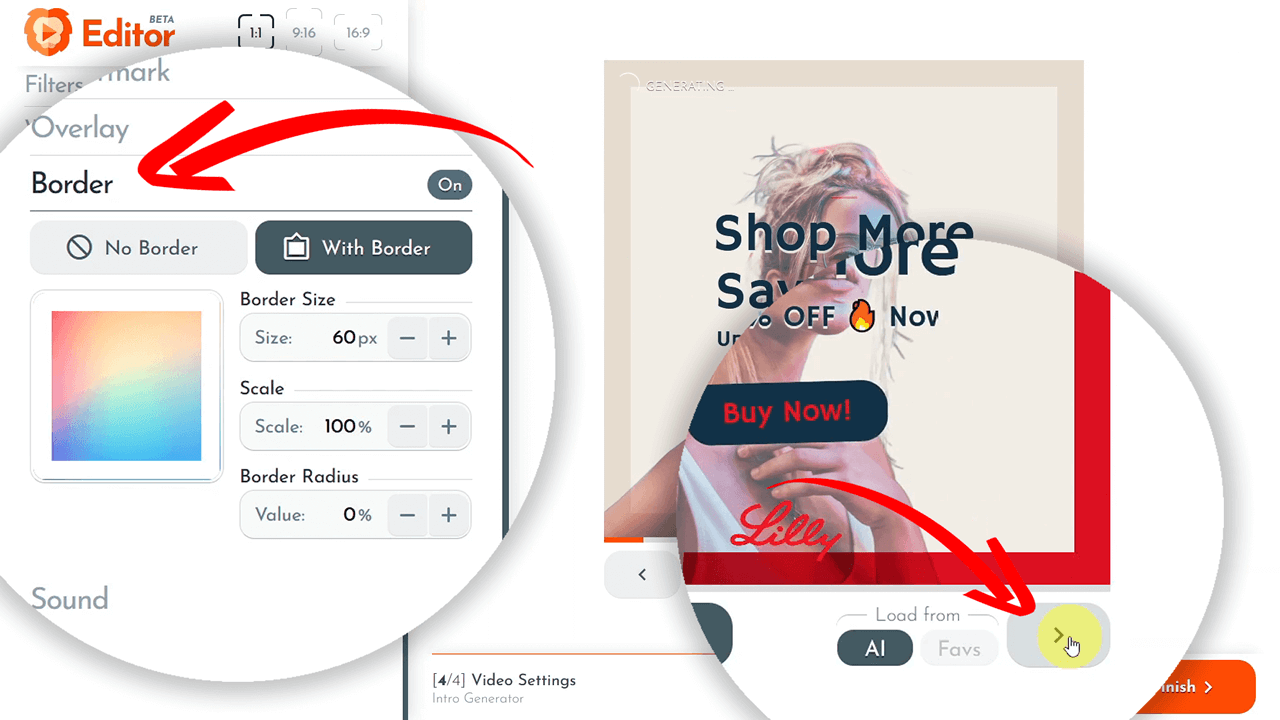
You may add an animated border to your video intro. Set preferences such as border size and scale, then let the RenderLion AI generate a new border motion effect.
Adding Sound
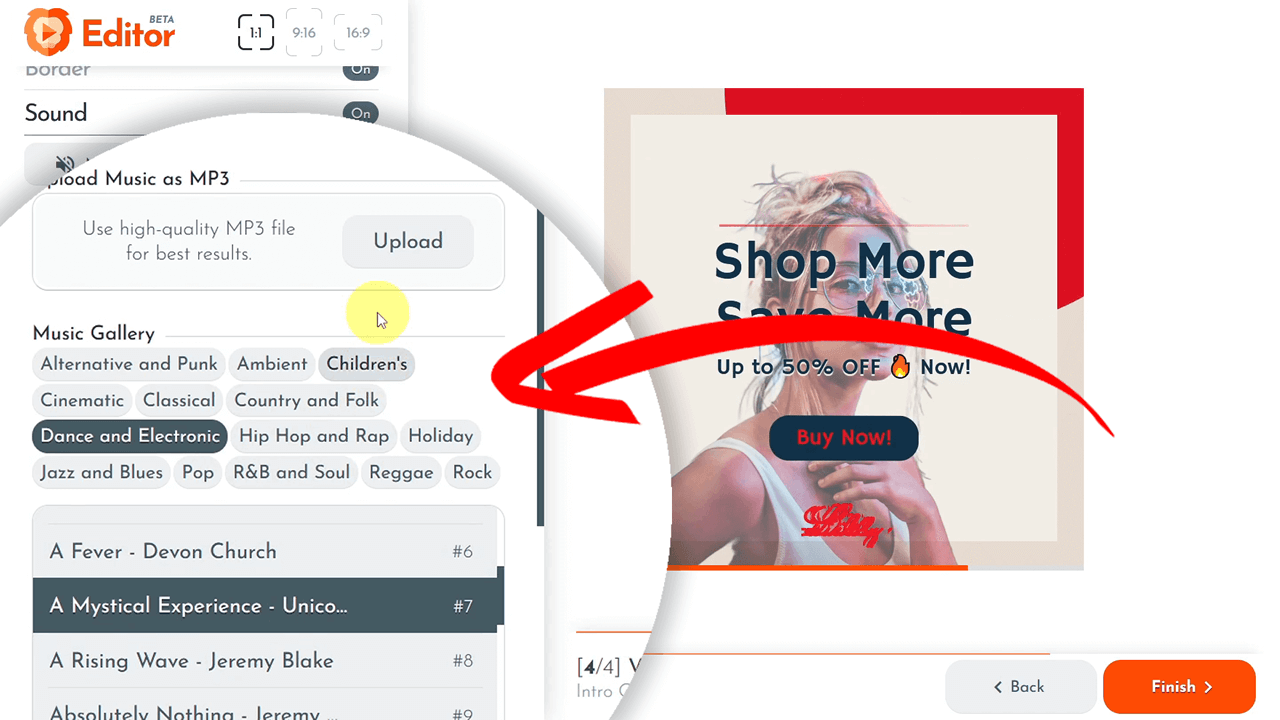
You can add sound to your animated intro from the RenderLion music gallery or upload your own audio files. I selected a melody from the gallery to complement my intro in this post.
Saving Your Video Intro
Once everything is set, check how the intro looks in different formats like portrait and landscape. Everything looks good? Click "Finish" to save your animation. You can edit it anytime or use it as a template for future projects.
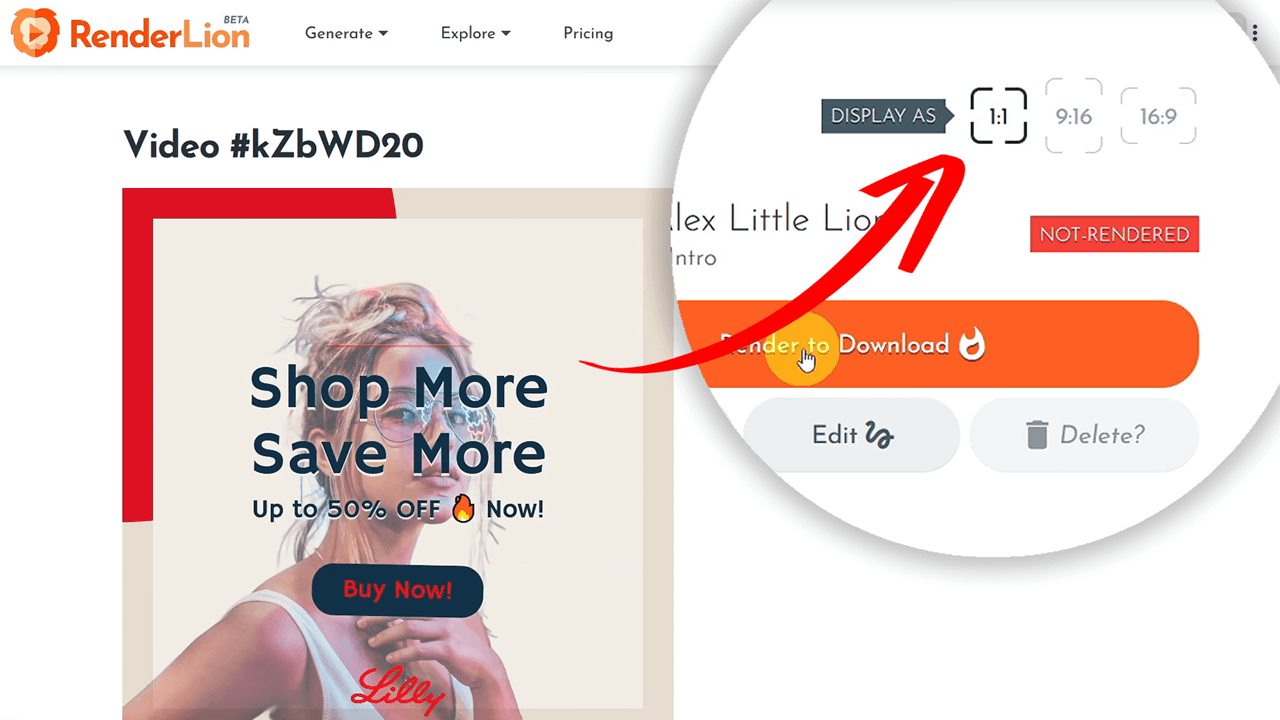
Rendering & Downloading Your Video and Thumbnails
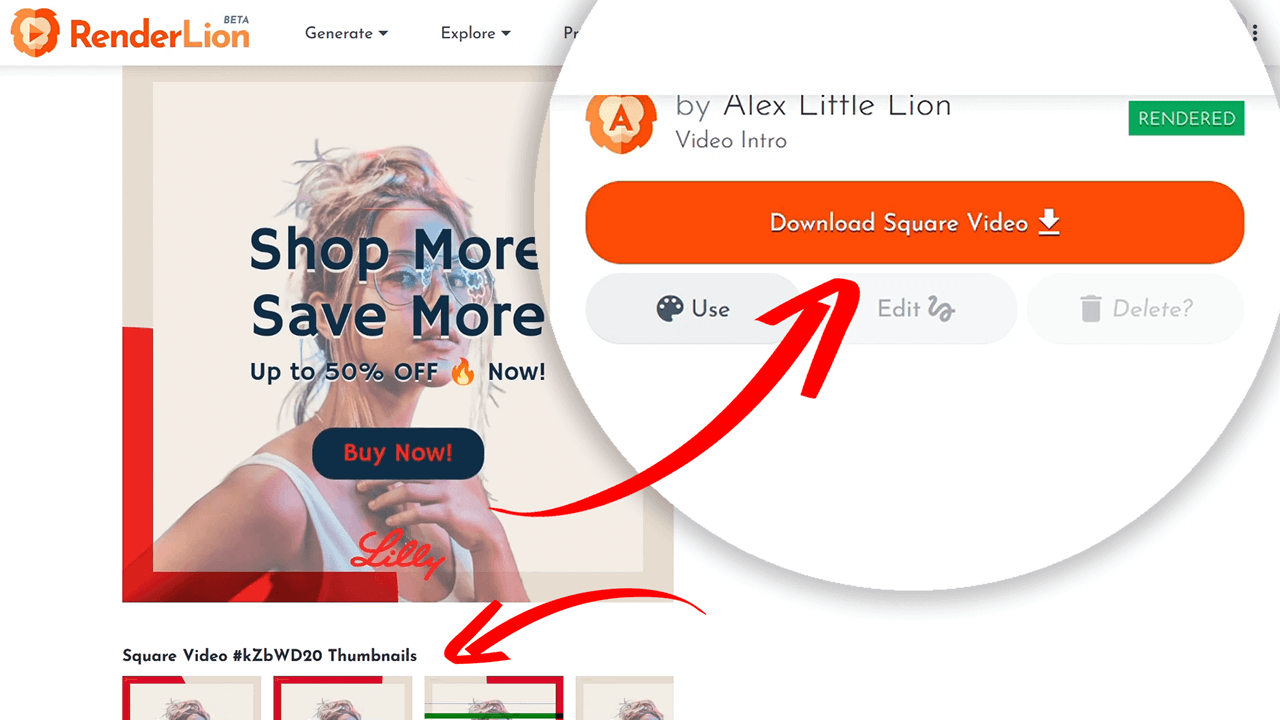
Render and download your video. RenderLion allows you to render and download in all three sizes (square, portrait, landscape) simultaneously.
Do you need image thumbnails? Once the video is rendered, several images have been automatically created to choose from and use as thumbnails.
Final Thoughts
Thank you for following this comprehensive tutorial on creating stunning video intros with RenderLion. As you've seen, RenderLion streamlines the video creation process, letting you customize content directly from simple static data. No complex editing software is needed!
Whether you're a content creator, digital marketer, or small business owner, RenderLion adapts to your needs with minimal effort. So why wait? Begin your creative journey today and bring your static data to life like never before.
I'm Alex, and I thank you for choosing RenderLion!